Making an Editable SwiftUI TagsView
Last post, we talked about the TagView but it was only view only. For this post, we talk about leveraging EditMode to allow TagView for both viewing and editing the data.
All of the code for this blog post is in this sample code repo.
Switching to State Objects
To shift from a static view to a view that can be changed, we need to make some minor changes in our view.
Step one:
Add an EditMode variable, so that we can detect whether we’re in an edit state or not.
@State private var editMode: EditMode = .inactiveThen we shift from a constant value to a @State values that can be changed.
// Removed: let tag: Tag
    @State var tag: Tag
    @State var tagPlaceHolder: String
This is needed because we’re going to be using a TextField which allows you to change String values. As the tagPlaceHolder will always be tied to the value of the tag itself, let’s make life easier for ourselves by adding an initializer.
    init(editMode: EditMode = .inactive,
         tag: Tag) {
        self.editMode = editMode
        self.tag = tag
        self.tagPlaceHolder = tag.toString
    }
This way we can continue to use the same initializer that we had been using. ie; TagView(tag: Tag("tag")) without adding a chance that the tag value and the tagPlaceHolder could ever get out of sync.
Step two:
Now we just have to change the body property to leverage the editMode state and either show a static view or TextField that will allow a user to change the value.
First, we need to add a way to toggle the editMode. I added a long press gesture to the static view to toggle the value.
	.onLongPressGesture {
		editMode = .active
	}
Step three:
Now that we can have different editMode states, we can leverage them with an if/else block.
if editMode == .active {
TextField(Constants.Tag.placeholder,
text: $tagPlaceHolder,
axis: .vertical)
.textFieldStyle(.plain)
.multilineTextAlignment(.center)
.onSubmit {
editMode = .inactive
convertToTag(placeholder: tagPlaceHolder,
baseTag: tag)
}
} else {
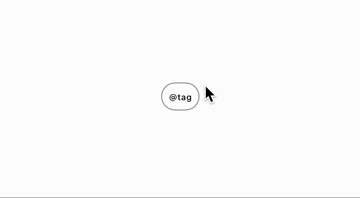
Text("@\(tag.tag)")
if let payload = tag.payload {
Text("@\(tag.tag)(**\(payload)**)")
} else {
Text("@\(tag.tag)")
}
}Using the .onSubmit for the TextField allows us to toggle the editMode to reset the view and our new convertToTag function to manage the logic for the conversion from a String to a Tag.
While the Text to TextField are visually different; I felt that the overlay should also change to better illustrate the change.
	Group {
		if editMode == .active {
			RoundedRectangle(cornerRadius: 8)
				.stroke(style: StrokeStyle(lineWidth: 1,
										   dash: [2]))
				.foregroundColor(Color.Tag.border)
		} else {
			Capsule()
				.stroke(Color.Tag.border,
						lineWidth: 1)
		}
	}
Personally, I felt that the dashed rounded rectangle looked a little better as the TextField expands.
Step four:
Lastly, we fill in the placeholder for the convertToTag logic.
    func convertToTag(placeholder: String,
                      baseTag: Tag) {
        guard let convertedTag = placeholder.toTag() else {
            tagPlaceHolder = baseTag.toString
            return
        }

        self.tag = convertedTag
        self.tagPlaceHolder = convertedTag.toString
    }
This makes sure that the text converts to a Tag. Otherwise, we reset our tagPlaceholder back to the original this way incorrect strings don’t linger for the next time that the TextField is shown. Feel free to comment that bit out and see what you get.
If it’s properly converted, we reset the tag (and the tagPlaceHolder, so that the edge cases for a tag without a placeholder don’t result in a tag of @tag and a saved tagPlaceholder of @tag()).
Unfortunately, our existing extract tags conversion code is for Substring objects not String objects, so we needed a new extension to put in that logic. This also allowed us to put in some business logic to ensure that the tag conversion works when this is exactly one tag in the entered text.
    func toTag() -> Tag? {
        guard self.contains("@") else { return nil }

        let tags = Substring(self).extractTags()

        // We only want to convert from `String` to `Tag`, when there's one and only one tag in it.
        guard tags.count == 1 else { return nil }

        return tags.first
    }
Seeing it in action
We walk through the following cases:
- Text that isn’t a tag.
- Text that is multiple tags.
- Text with a tag without a payload.
- Text with a tag with a payload.
- Text with a very large payload to verify wrapping.
Next post, we will pull back a bit to talk about the different architectural options such as MVVM, VIPER, or TCA for a SwiftUI project, before we get too deep into how we’ve defined our UI.